The Ultimate Classic Cookie Monster Cookie Recipe
Okay, so… ever craved a cookie that feels like it came straight out of your childhood dreams? Yeah, me too. That’s why I had to make this Cookie Monster cookie recipe—and trust me, it’s epic.
I wanted something soft, super gooey, and packed with all the good stuff—like two kinds of chips and bright blue cookie dough. It’s the kind of treat that makes you smile before the first bite. My kids go wild every time I bake these!
These cookies are sweet, chewy, and stuffed with fun. You don’t need anything fancy—just a big bowl, some chips, and your Cookie Monster spirit. And the best part? They’re really easy.
So grab your apron (or don’t—no judgment here). Let me walk you through my favorite way to bake these big blue beauties. You’re gonna love ’em.

Why You’ll Love This Recipe
- Kid-Approved & Fun to Make: The bright blue dough and mix of cookie chunks make it a hit with kids and adults alike.
- Big Flavor, Chewy Texture: Soft on the inside with just the right bite. The mix of textures from cookies and chocolate chips is irresistible.
- No Chill Time Required: You can bake right away, though chilling is optional for deeper flavor.
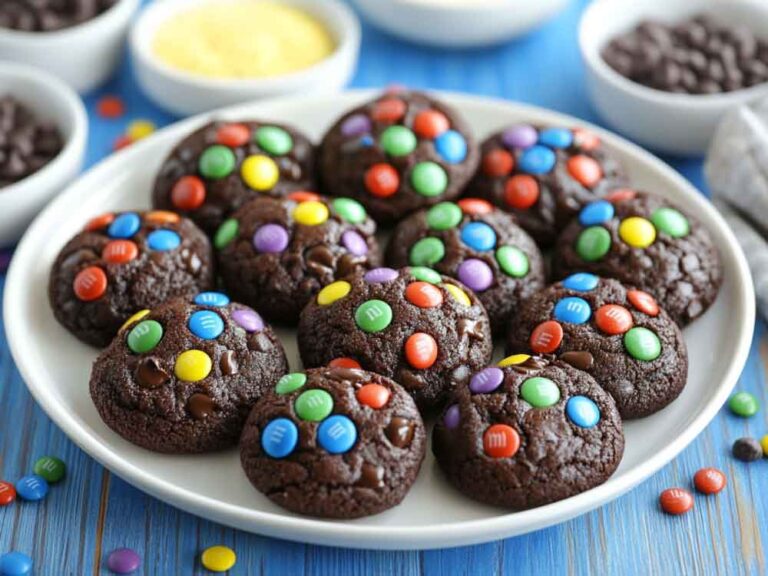
- Customizable: Add your favorite cookies, chocolate chips, or even candies like M&M’s.
- Perfect for Parties: These cookies are fun, eye-catching, and great for birthday parties or cookie swaps.
What You Need to Know Before You Start
Prep Time & Cook Time:
Prep Time: 20 minutes
Bake Time: 10–12 minutes
Total Time: About 40 minutes
Servings:
Makes around 24 cookies. Enough for a crowd or to freeze for later.
Difficulty:
Beginner-friendly. If you can mix and scoop, you can make these.
Required Kitchen Tools
- Mixing bowls (1 large, 1 medium)
- Electric hand or stand mixer
- Measuring cups and spoons
- Rubber spatula or wooden spoon
- Baking sheet(s)
- Parchment paper or silicone baking mat
- Cookie scoop (optional, but helps with uniform size)
- Wire cooling rack
Ingredients for Cookie Monster Cookies
Here’s what you’ll need to bring these monster cookies to life (exact amounts in the recipe card at the end):
Mini Oreos or Crushed Oreos: For extra cookie goodness and color contrast.
All-Purpose Flour: The base that holds everything together. Spoon and level for accuracy.
Cornstarch: Adds softness and makes the cookies extra chewy.
Baking Soda & Salt: Helps the cookies rise and brings out flavor.
Unsalted Butter: Softened to room temperature for easy creaming.
Granulated Sugar & Brown Sugar: A mix for sweetness and depth of flavor.
Eggs: Helps bind the dough and adds moisture.
Vanilla Extract: A classic flavor enhancer.
Bright Blue Gel Food Coloring: For that Cookie Monster color. Use gel for vibrant results.
Mini Chocolate Chips: For even distribution and plenty of chocolate in every bite.
Crushed Chocolate Chip Cookies (like Chips Ahoy): Adds crunch and fun.

How to Make Cookie Monster Cookies – Step-by-Step
1. Whisk Dry Ingredients
In a medium bowl, mix together the flour, cornstarch, baking soda, and salt. Set this bowl aside.
2. Cream the Butter and Sugars
In a large bowl, use a hand or stand mixer to beat the softened butter, granulated sugar, and brown sugar. Mix for 2–3 minutes until smooth and creamy.
3. Add Wet Ingredients
Add the eggs one at a time, mixing until combined. Then stir in the vanilla extract and blue gel food coloring. Mix until the dough is bright blue and evenly colored.
4. Combine Wet and Dry
Slowly add the dry ingredients to the wet mixture. Mix on low speed until a dough forms.
5. Fold in the Goodies
Use a spatula or wooden spoon to gently fold in the mini chocolate chips, crushed chocolate chip cookies, and Oreos.
6. Scoop the Dough
Scoop the dough into 1.5 to 2-tablespoon-sized balls and place them on a baking sheet lined with parchment paper. Leave about 2 inches between each cookie.
7. Bake
Bake at 350°F (177°C) for 10–12 minutes, or until the edges look set. The centers might still look soft—that’s perfect. They’ll finish setting as they cool.
8. Cool
Let the cookies cool on the baking sheet for 5 minutes, then move them to a wire rack to cool completely.

How to Serve Cookie Monster Cookies
These cookies are fun and flexible. Here are a few ways to enjoy them:
- As-is, fresh from the oven: Soft, warm, and gooey.
- With a glass of cold milk: A classic pairing.
- For ice cream sandwiches: Press ice cream between two cookies and freeze.
- On party platters: Great for birthdays or themed events with other colorful treats.
- In cookie jars or gift bags: Makes a fun edible gift.
Storing Cookie Monster Cookies
- Room Temperature: Store in an airtight container for up to 5 days.
- Freezer (Baked Cookies): Freeze cooled cookies in a zip-top bag for up to 2 months.
- Freezer (Dough Balls): Freeze raw cookie dough balls on a tray, then transfer to a bag. Bake straight from frozen, adding 1–2 minutes to the baking time.
Tips and Tricks for Success
- Use Gel Food Coloring: Liquid food coloring won’t give the same bold blue look and may water down the dough. Gel is more vibrant and easier to control.
- Don’t Overmix: Once the flour is added, mix just until combined. Overmixing can make the cookies tough.
- Check the Bake Early: Every oven is a little different. Start checking the cookies at 10 minutes to avoid overbaking.
- Customize the Mix-ins: You can swap mini Oreos for chopped cookies & cream bars, add colorful candy-coated chocolates, or even a touch of sea salt on top.
- Scoop Evenly: A cookie scoop ensures even baking and uniform size.
Nutrition Information
| Nutrient | Per Cookie (Approximate) |
|---|---|
| Calories | 190 |
| Carbohydrates | 24g |
| Protein | 2g |
| Fat | 9g |
| Saturated Fat | 5g |
| Fiber | 1g |
| Sugar | 14g |
| Sodium | 120mg |
Note: Nutrition info is estimated and may vary based on brands used and exact serving size.
The Ultimate Classic Cookie Monster Cookie Recipe
Course: Cookie24
cookies20
minutes10
minutes190
kcal30
minutesIngredients
2 and 1/4 cups (281g) all-purpose flour
1 and 1/2 teaspoons cornstarch
1/2 teaspoon salt
1 teaspoon baking soda
3/4 cup (170g) unsalted butter, softened
1/2 cup (100g) granulated sugar
1/2 cup (100g) packed light or dark brown sugar
2 large eggs, at room temperature
2 teaspoons vanilla extract
Blue gel food coloring
1 cup (180g) mini chocolate chips
3/4 cup crushed chocolate chip cookies
3/4 cup mini Oreos or crushed Oreos
Directions
- Preheat oven to 350°F (177°C). Line baking sheets with parchment paper.
- Mix dry ingredients: In a medium bowl, whisk flour, cornstarch, baking soda, and salt.
- Cream butter and sugars: In a large bowl, beat butter, granulated sugar, and brown sugar until light and fluffy (2–3 minutes).
- Add eggs and vanilla: Beat in eggs one at a time, then add vanilla and blue food coloring. Mix until evenly colored.
- Combine dry and wet: Slowly mix dry ingredients into the wet until just combined.
- Add mix-ins: Fold in mini chocolate chips, crushed cookies, and mini Oreos.
- Scoop dough: Use a cookie scoop to portion dough onto prepared baking sheets, spacing 2 inches apart.
- Bake: Bake for 10–12 minutes or until edges are set. Centers may look slightly soft.
- Cool: Let cookies rest on the baking sheet for 5 minutes, then transfer to a wire rack.
Cookie Monster Cookie FAQs
Can I make these ahead of time?
Yes! You can chill the dough for up to 24 hours or freeze it for later. Just scoop and store in the freezer.
Do I have to use Oreos?
Nope. You can swap with other cookies, crushed candy bars, or skip entirely and just load up on chips.
Why do my cookies look pale?
If the dough isn’t fully mixed with the blue gel, or if baked too short, the color might look dull. Be sure the gel is well incorporated.
Can I use natural coloring?
Natural food coloring can work, but it might not be as bright. Spirulina or blue butterfly pea powder are options, though results will vary.
Conclusion
These Ultimate Classic Cookie Monster Cookies are soft, sweet, and full of fun with every bite. Whether you’re baking with kids or prepping for a colorful dessert table, they’re sure to grab attention and satisfy every cookie craving. With the right mix of crunch, chocolate, and chewy goodness, these cookies really do bring out the inner monster in all of us—in the best way.


